There are two different products with the same name “Google Calendar”:
- The calendar and contacts service (with Web UI and CalDAV/CardDAV support) hosted at calendar.google.com / contacts.google.com.
- The Android calendar app, which can not only be used to access the service mentioned above, but also other Android calendar accounts like DAVx⁵. You can use the Google Calendar app to access a privately hosted, DAVx⁵-synchronized calendar without storing calendar data at Google.
This page is about the calendar / contacts service at *.google.com, i.e. contacts and events which are stored at Google and not about the Google Calendar app.
At the moment (June 2023), it seems to be possible to synchronize
- calendars of Google accounts (over CalDAV)
- contacts of Google accounts (over the CardDAV backend of the Google People API)
using DAVx⁵. Tasks over CalDAV are not provided by Google.
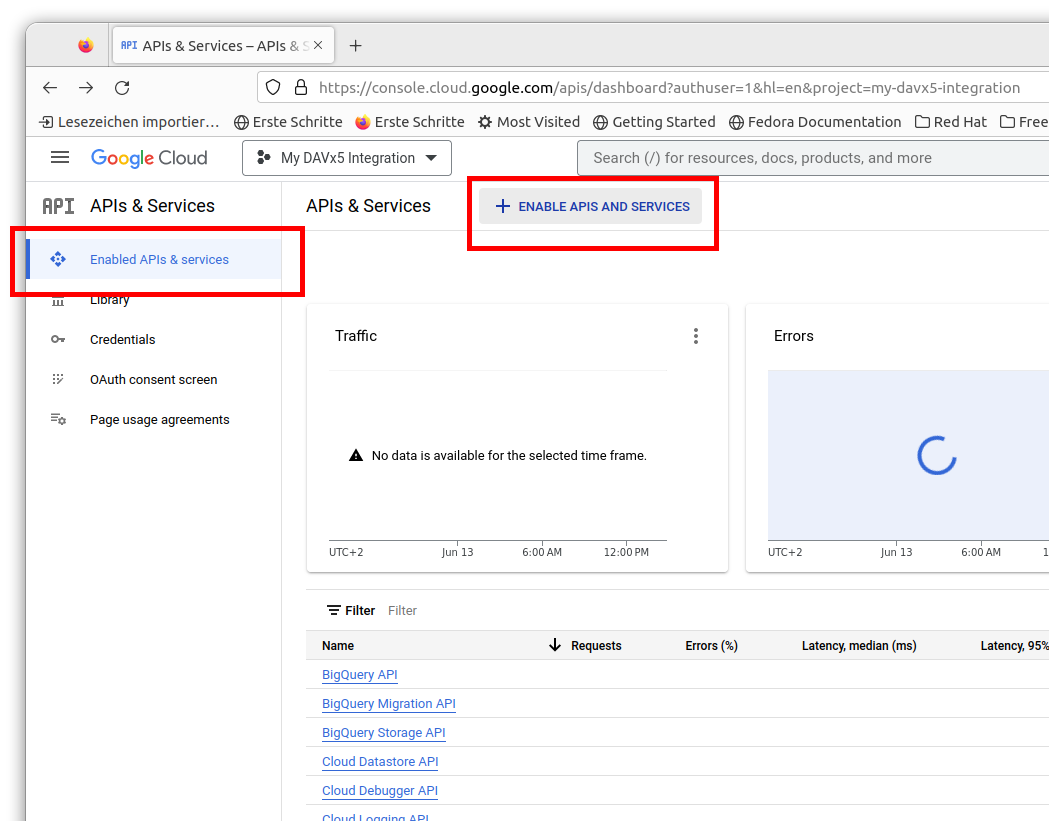
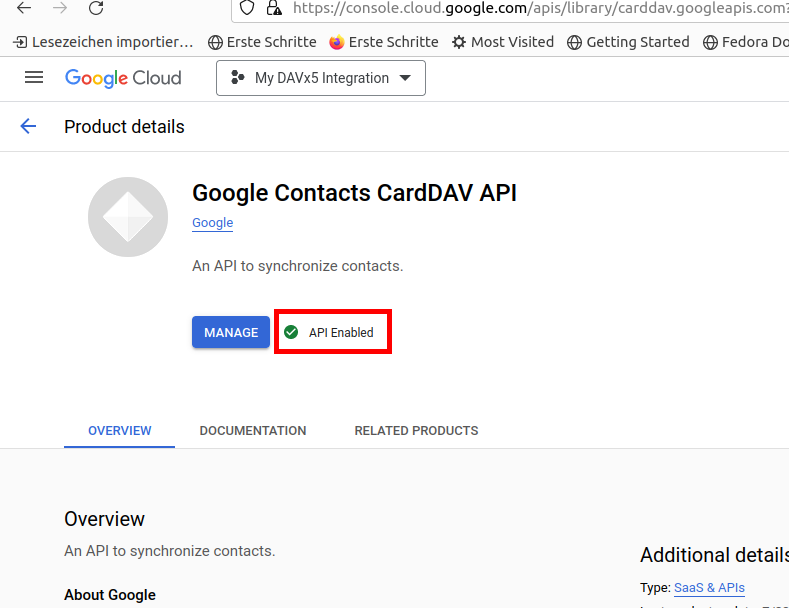
Starting from June 6th 2023, Google has disabled their CardDAV API for every authentication method except OAuth 2.0. You will need DAVx5 4.3.4.1 or newer to choose the new OAuth based login method (see instructions below).
Synchronizing with Google accounts is not officially supported neither by DAVx⁵ nor by Google. In the past, there were server errors from time to time.
OAuth Login for Google (recommended)
Since June 2023, Google has disabled all authentication methods except OAuth for their services.
- Open DAVx5, choose "Create new account" (floating + button).
- Choose "Google Contacts / Calendar" in the login dialog.
- Enter your Google account (in most cases, a Gmail email address).
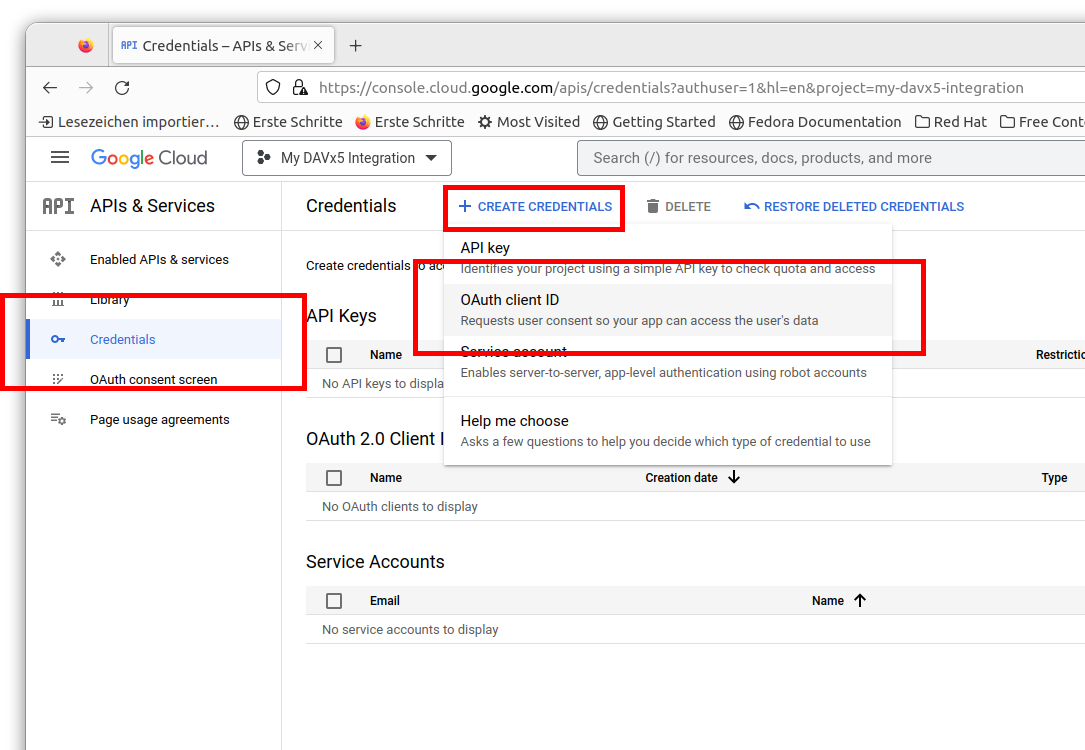
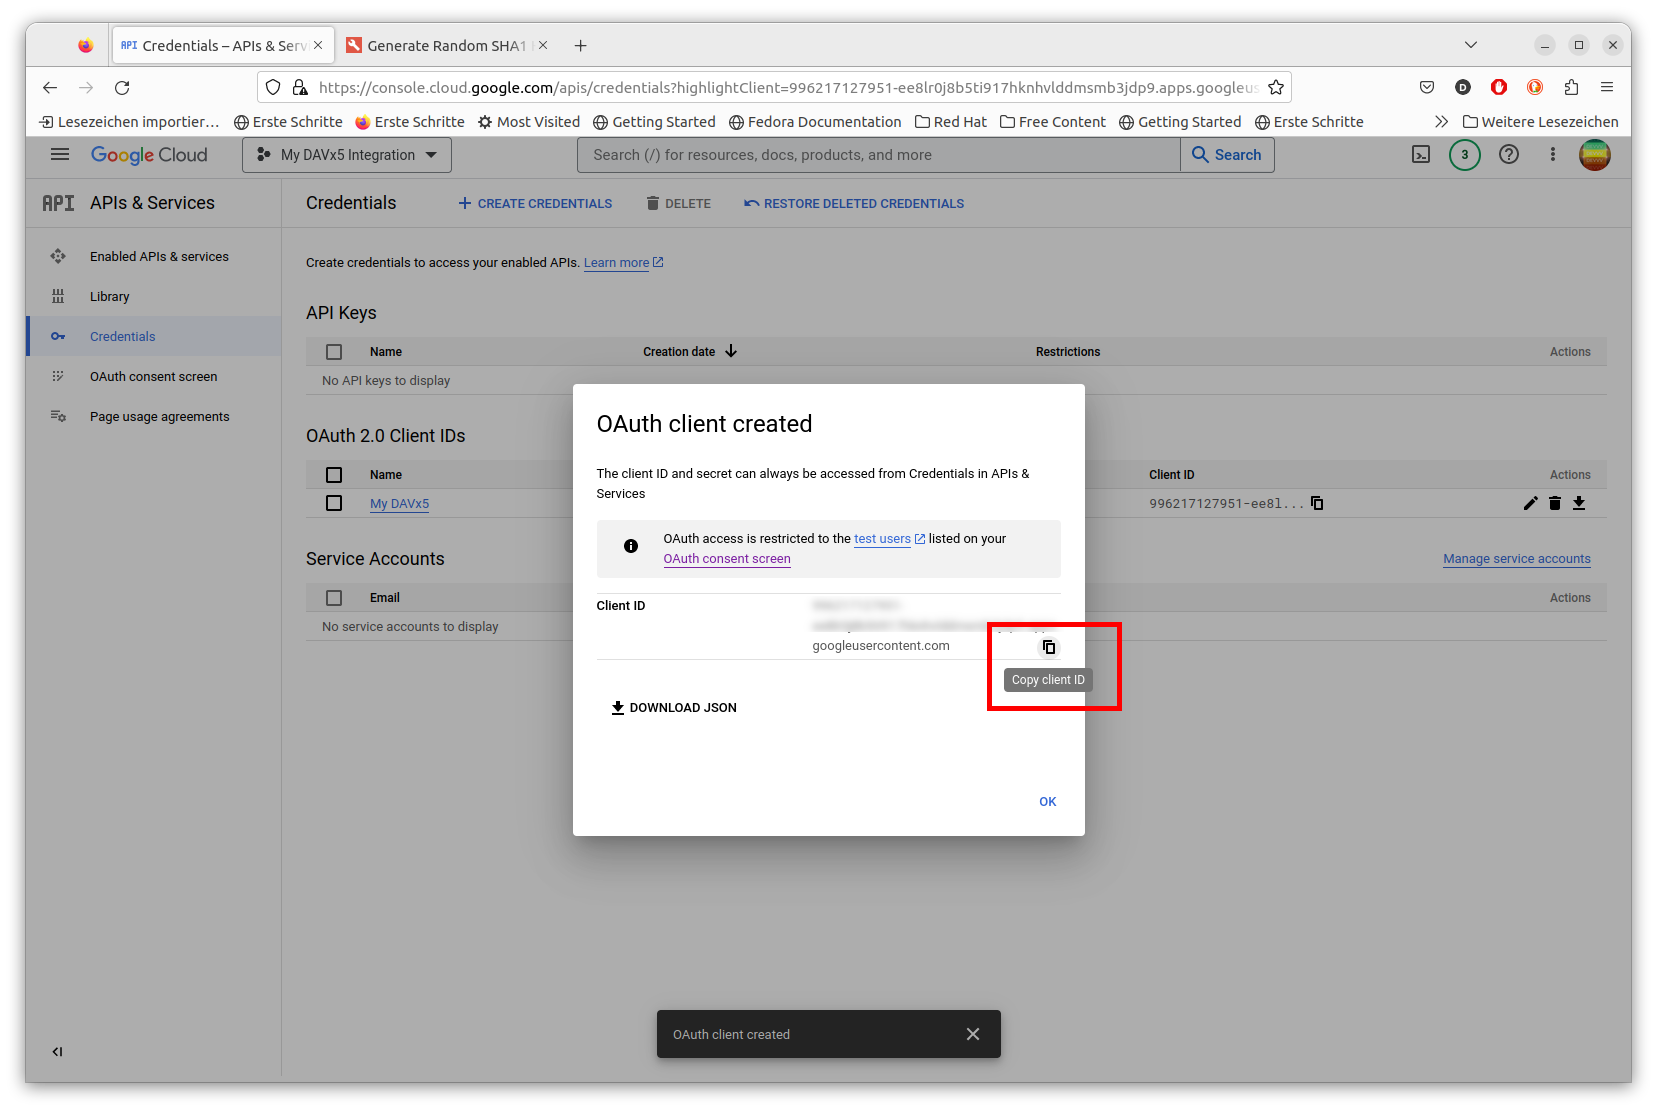
- If you enter an custom Client ID, it will override the default client ID. Normally this shouldn't be necessary.
- Click on "Login" and follow the instructions.
If you're using a davx5-ose: As long as our DAVx⁵ OAuth login has not been "verified" by Google, you have to check "Advanced" and allow the "unsecure app" (see screenshots below: Scenario 1). If the ID is currently blocked by Google (Scenario 2) or if you use your own Client ID (Scenario 3), please follow the instructions in the screenshots.- Authorize DAVx⁵ to access your Google contacts and calendars.
You should now be able to synchronize your contacts and calendars.
Contact group method: Google CardDAV does not map the "labels" from Google Contacts – so there's unfortunately no contact group (label) support. Choose "per-contact categories" as contact group method to minimize problems.